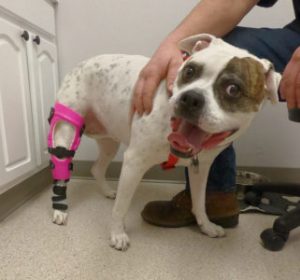
By: Terry Lackmeyer, My Pet’s Brace Customer Service Representative
The day the brace is delivered, you arrive excited and concerned – wondering how your dog will respond to the device. Fear not, as our adaptable canines usually take to the whole process much better than we would. Since knowing what to expect makes it easier for everyone, here’s a glimpse into what will happen that day.
With minor exceptions, the delivery process for braces is similar whether we are fitting a stifle (knee), carpal, hock, or elbow brace. Since the stifle brace for a torn cruciate ligament is the most common brace we make, we’ll focus on that one.
The clinician will begin by reviewing the various brace parts – pointing out the different straps and pads and explaining their purpose. Special attention is paid to the suspension sleeve as that piece is responsible for suspending, hence the name suspension sleeve, the brace on the dog’s leg.
Next, the clinician will demonstrate putting the brace on your dog’s leg which begins with powdering the suspension sleeve. Powdering is very important as it helps to reduce friction and the chance of irritation. Starting from the bottom up, the clinician will put the brace on your dog’s leg attaching each strap and explaining how to tell if the strap is adjusted correctly.
Once the brace is on, the clinician will check the fit. Sometimes, the brace or the suspension sleeve needs adjusting. If that is the case, the clinician will make those necessary adjustments.
Following the adjustments, the brace is placed on the dog’s leg again and the clinician will double-check the fit to make sure everything is correct. Satisfied, the clinician will have you slowly walk your dog up and down the hallway several times. This walk enables us to “see the brace in action”, see how the dog is taking to it, and check for slipping or pinching.
If everything looks good, the clinician will mark the straps. Marking the straps means that a white mark is placed on each strap aligning it to the buckles. This makes putting the brace on easier as it tells you how tightly to pull the straps.
Now it’s your turn to put the brace on. Just like anything new, people feel like they are all thumbs when putting the brace on for the first few times. This is totally normal. After doing this a few times, you will be able to put the brace on and take it off easily. Practicing putting the brace on while here in the clinic is very important. It enables you to get a feel for the process and allows us to make sure you understand how the brace goes on and how snuggly it should fit.
Sometimes, you need to practice putting the brace on more than once. Don’t worry, if you get home and can’t remember how to put the brace on, we have a detailed video on our website showing the process: https://mypetsbrace.com/training-videos/.
It’s important to note that, with rare exceptions, there is a break-in period for all braces. Initially, the dog starts by wearing the brace for 3 hours per day for stifle braces and 2 hours per day for all other braces. That wearing time increases by 1 hour daily until the dog is wearing the brace full-time. All clients leave the clinic with a wearing schedule, written instructions for putting the brace on, instructions for accessing the video on our website showing how to put the brace on, and a reminder to call us with any questions or concerns they may have. We schedule follow-up care in three weeks and thereafter at regular intervals. By working together, we can provide your dog with the best fitting leg brace to help their orthotic problem.

